Zapier Round Robin Implementation - Step By Step Guide
Zapier has no native round-robin action. This guide walks you through connecting Zapier to Robin Router so every inbound lead gets assigned to the next rep in line — automatically, every time.
What You Need
- A Zapier account (Webhooks by Zapier requires a paid plan)
- A Robin Router account with a workflow and at least two robin group members
Step 1: Copy Your Webhook URL from Robin Router
Log into Robin Router. Open your workflow and go to the Endpoint tab. Copy the webhook URL.
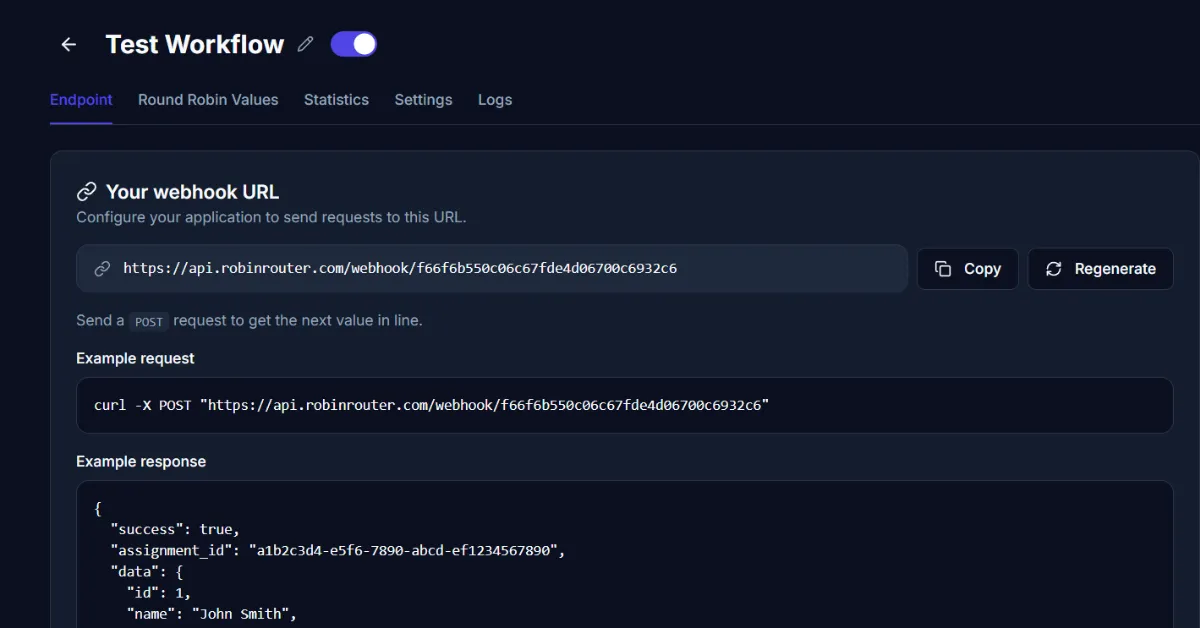
The URL looks like https://api.robinrouter.com/webhook/your-token. This is a unique, token-authenticated endpoint. Treat it like a password. If it's ever compromised, hit Regenerate to get a new one.
Step 2: Create a New Zap and Set Your Trigger
In Zapier, create a new Zap. Set up your trigger — this depends on where your leads come from. Examples: new form submission (Typeform, Google Forms), new CRM contact (HubSpot, Salesforce), new spreadsheet row (Google Sheets, Airtable), new ad lead (Facebook Lead Ads, LinkedIn).
Configure and test your trigger so Zapier has sample data to work with.
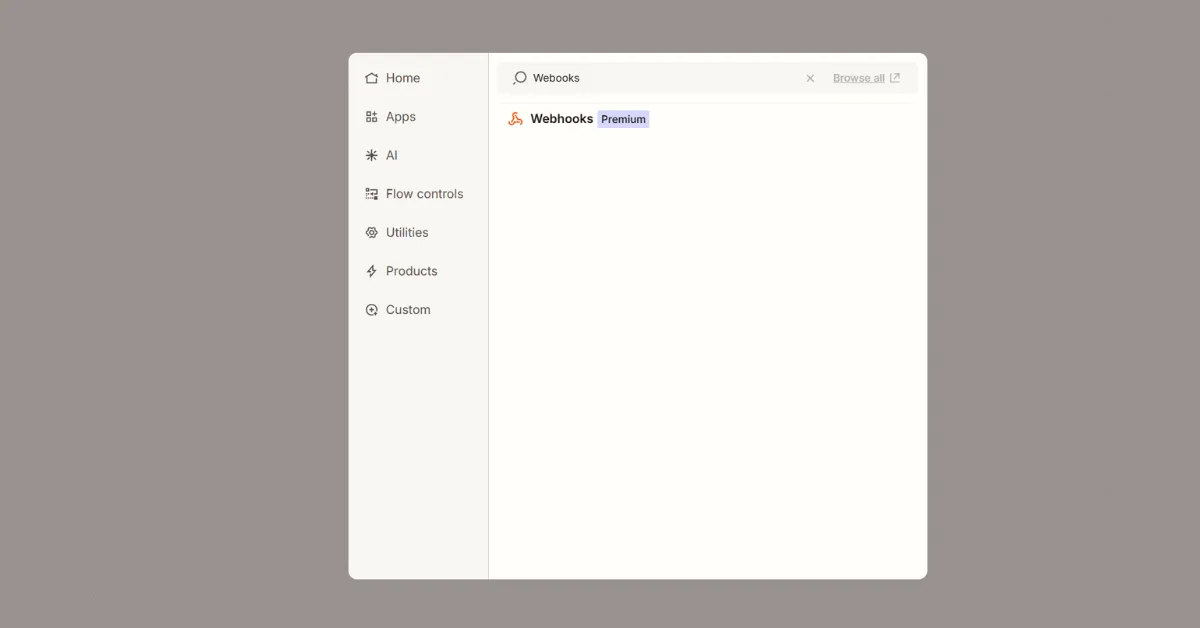
Step 3: Add the Webhooks by Zapier Action
Add a new action step. Search for "Webhooks" and select Webhooks by Zapier.
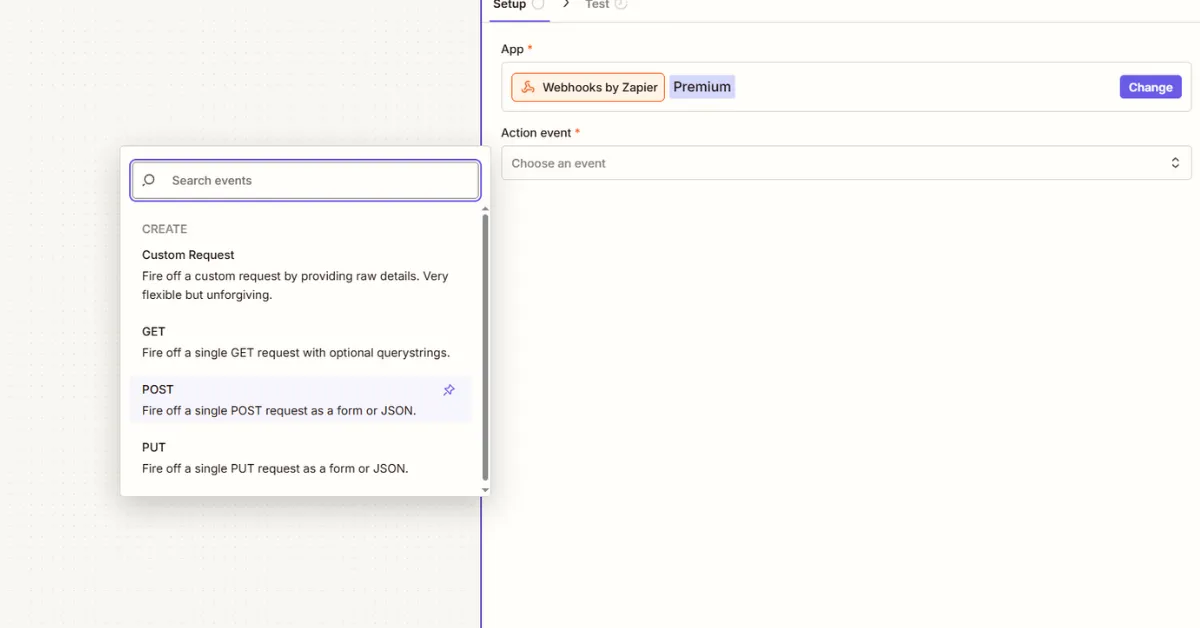
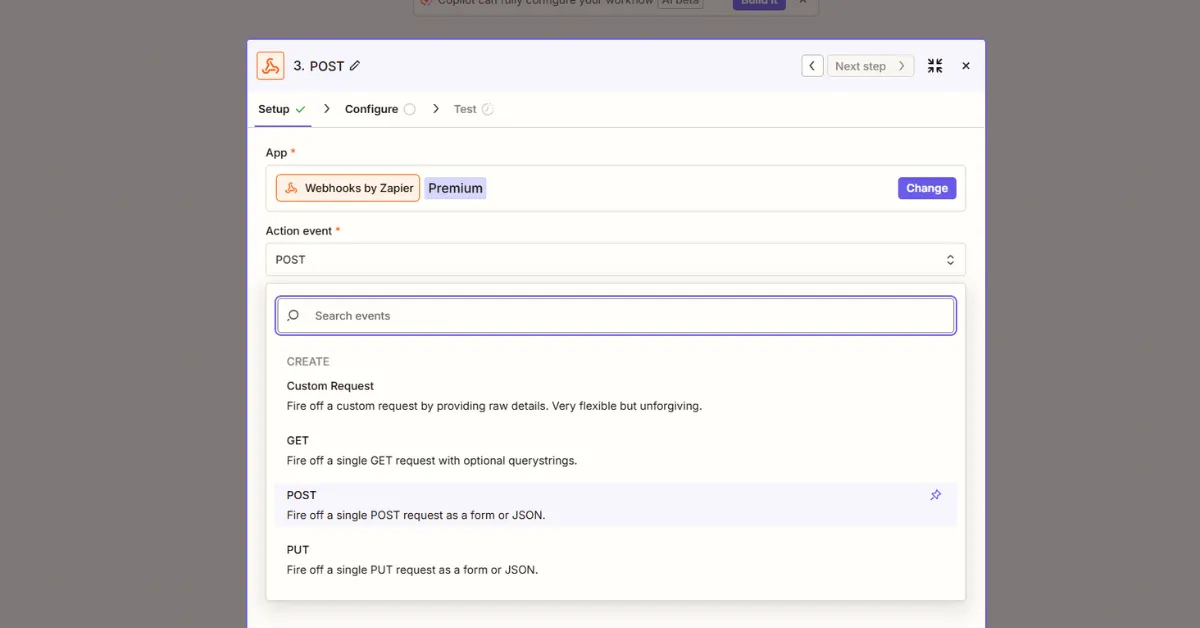
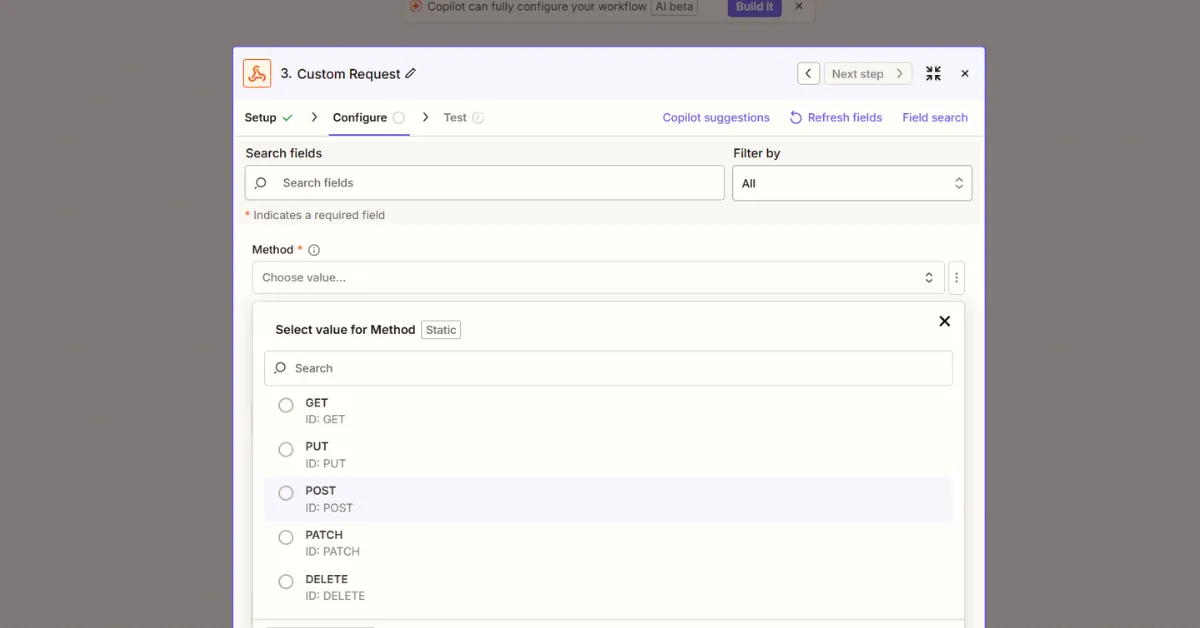
Step 4: Select POST as the Action Event
For the action event, select POST. Robin Router's webhook endpoint expects POST requests.
Step 5: Paste the Webhook URL
In the URL field, paste the webhook URL you copied from Robin Router. Set Payload Type to Form. Leave Data fields empty — Robin Router doesn't require a body to trigger the round-robin.

Set Wrap Request In Array to No. Leave all other fields at defaults.
Step 6: Test the Connection
Click Test step. Zapier sends a POST to your Robin Router webhook. You'll see the assigned team member's data in the response.

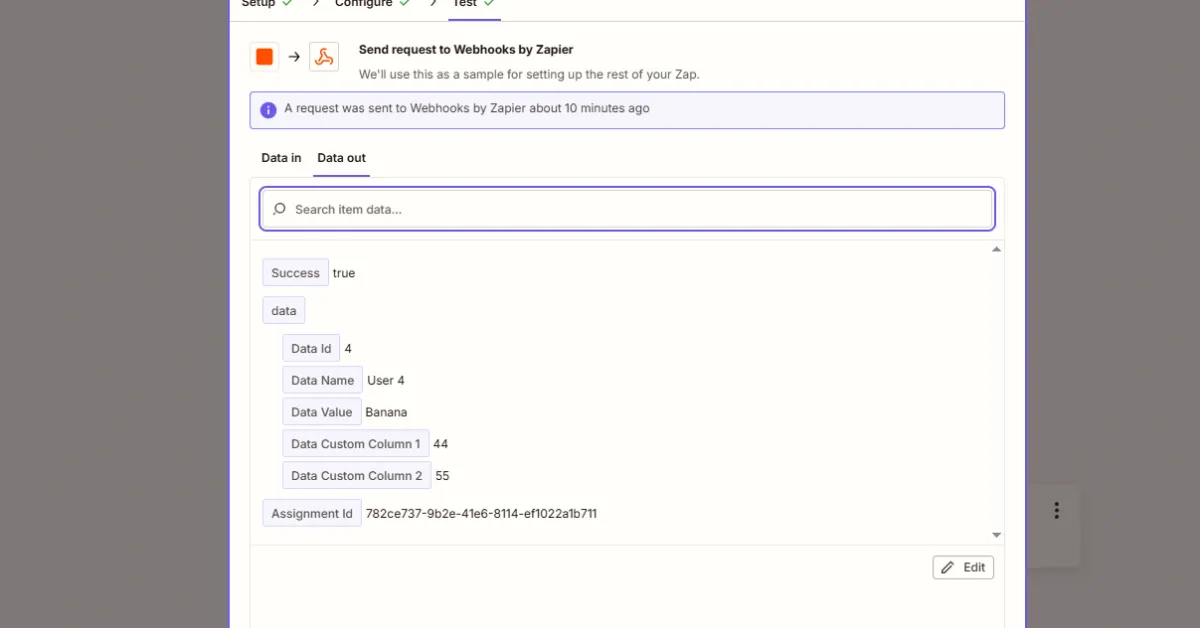
The response includes:
- Success —
trueif the assignment worked - Data Name — The assigned member's name
- Data Value — The assigned member's value (email, CRM ID, etc.)
- Data Custom Column 1, 2, ... — Any custom columns you've configured
- Assignment Id — A unique ID for this assignment
Use these fields in subsequent Zap steps — for example, Data Value as the CRM owner, or Data Name in a Slack notification.
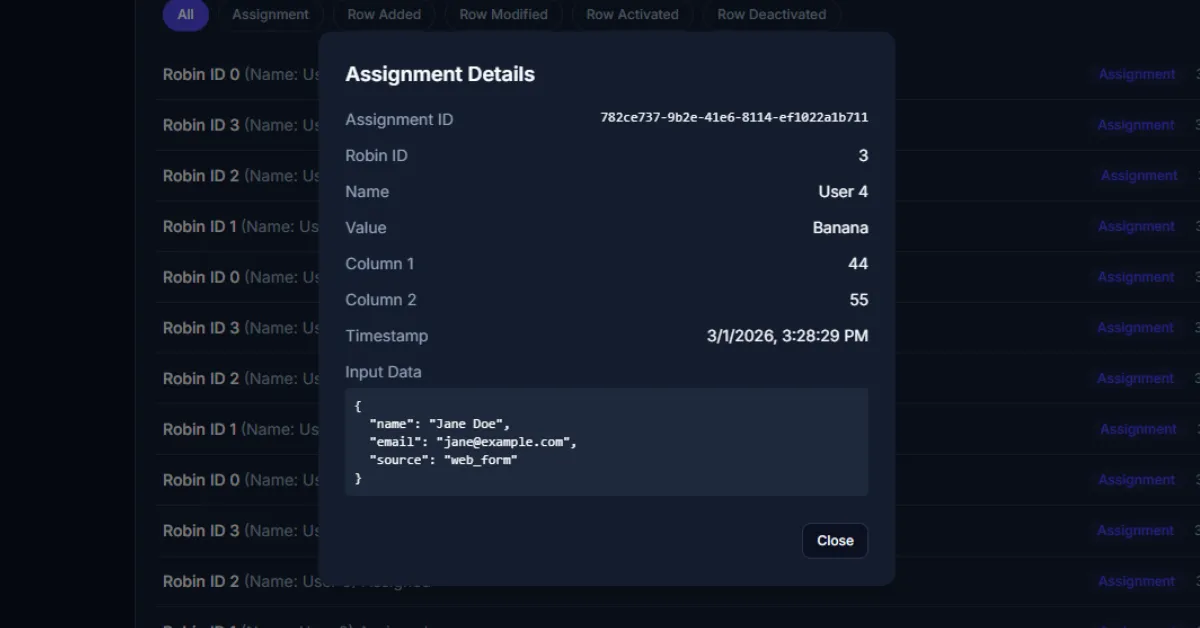
Step 7: Verify in Robin Router Logs
Back in Robin Router, go to the Logs page. You'll see the test assignment logged with the full details — assigned member, timestamp, and assignment ID.
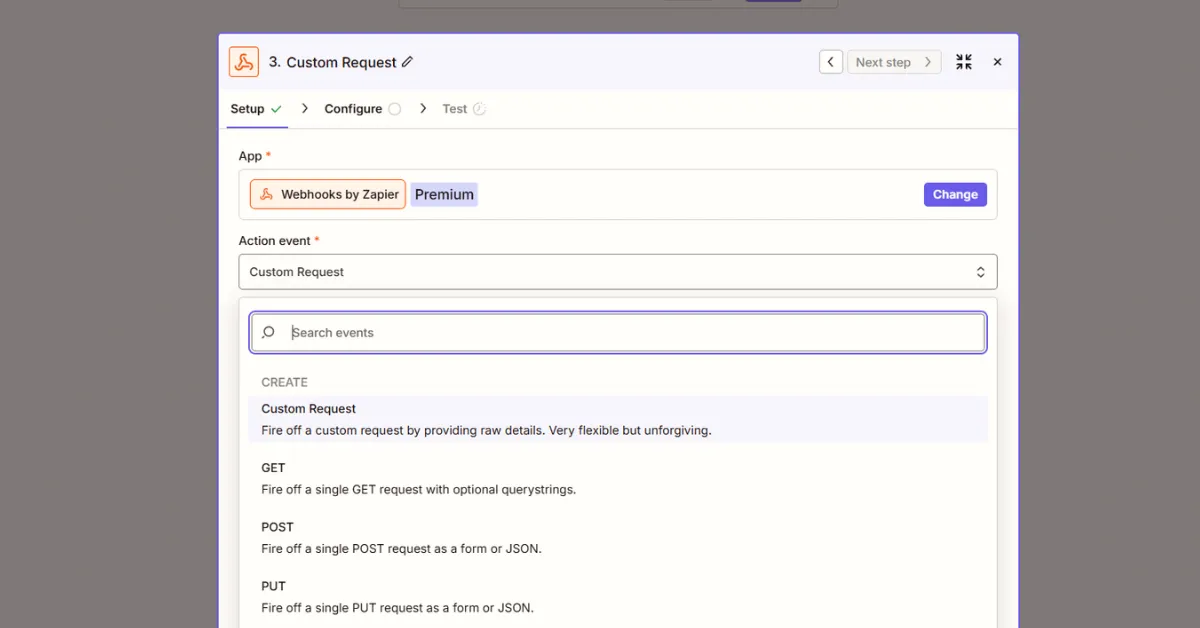
Optional: Send Lead Data with Custom Request
If you want to pass lead data (name, email, source) to Robin Router so it's logged with the assignment, use Custom Request instead of POST.
Set the Method to POST.
Set Data Pass-Through to False. In the Data field, add your lead information wrapped in input_data. Add a Header with key Content-Type and value application/json.
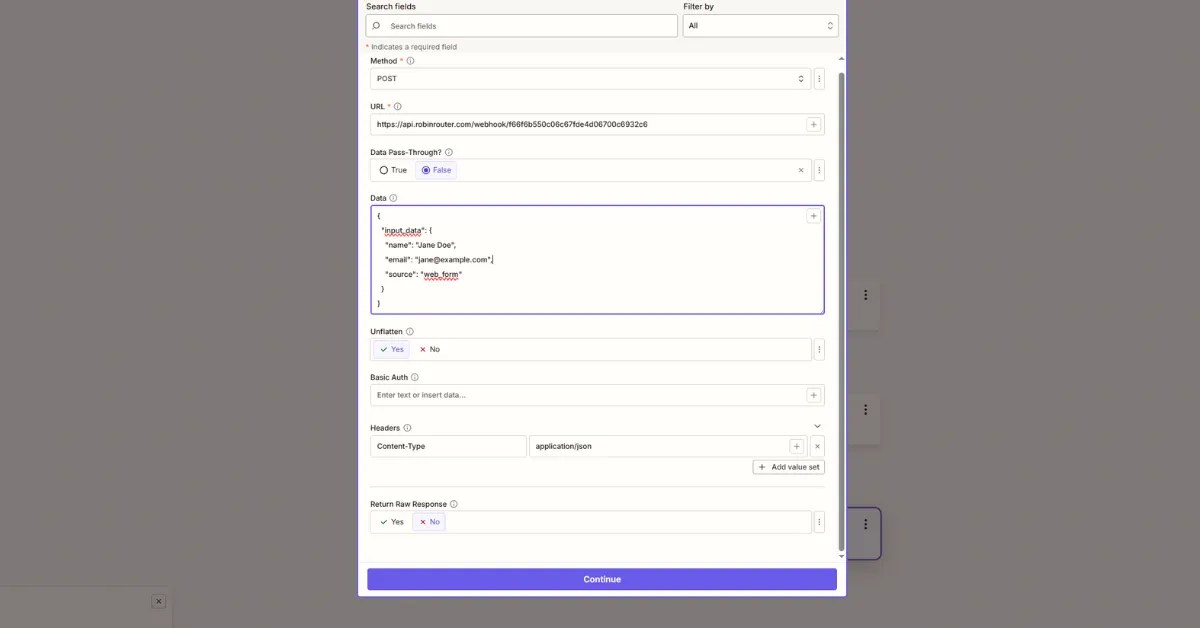
Example body:
{
  "input_data": {
    "name": "{{trigger_name_field}}",
    "email": "{{trigger_email_field}}",
    "source": "typeform"
  }
}
The input_data object can contain any fields you want. Robin Router stores this alongside the assignment record in the Logs page.
Done
That's it. Your Zap is connected to Robin Router. Every time your trigger fires, the next rep in the round-robin gets assigned automatically. Add downstream steps (CRM update, Slack notification, email sequence) using the response data from Robin Router.