Make Round Robin Implementation - Step By Step Guide
Make gives you visual workflow building and deep HTTP control. Pair it with Robin Router and you get fair, trackable lead distribution without writing a single line of code.
What You Need
- A Make account (free plan works — the HTTP module is available on all plans)
- A Robin Router account with a workflow and at least two robin group members
Step 1: Copy Your Webhook URL from Robin Router
Log into Robin Router, open your workflow, and go to the Endpoint tab. Copy the webhook URL.
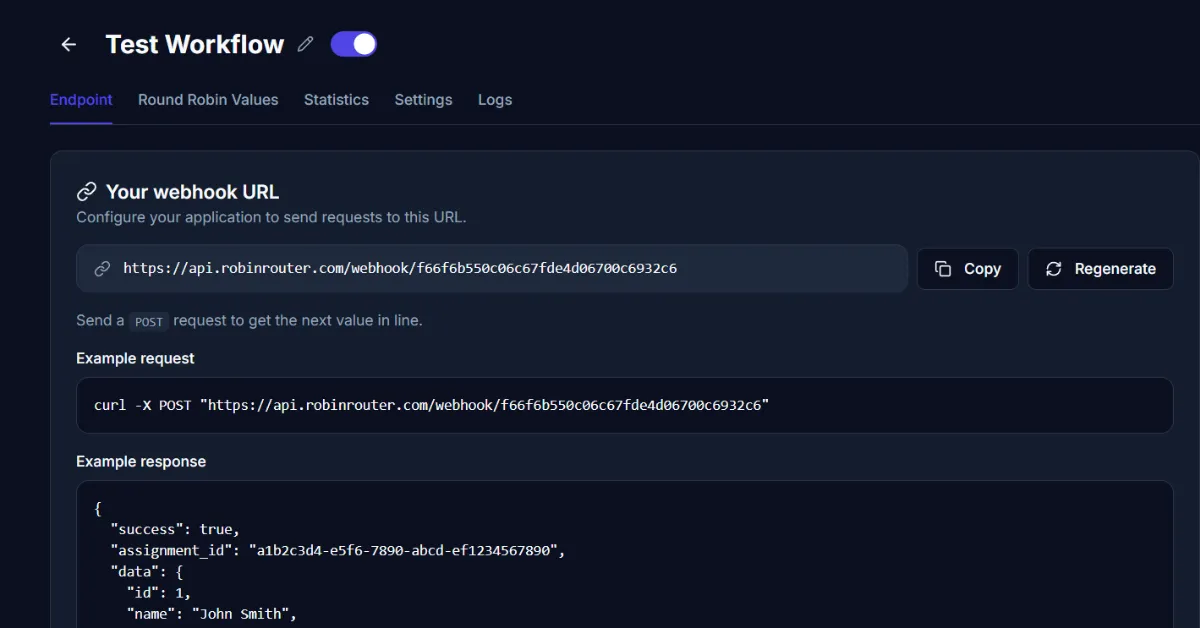
https://api.robinrouter.com/webhook/your-tokenThis URL is authenticated by the token in the path. Keep it secure.
Step 2: Create a New Scenario in Make
In Make, click Create a new scenario. Add your trigger module — this depends on your lead source. Examples:
- Webhooks → Custom webhook — Receive data from an external service
- Google Forms → Watch Responses — Google Form submissions
- HubSpot → Watch Contacts — New CRM contacts
- Typeform → Watch Responses — Typeform form fills
- Facebook Lead Ads → Watch Leads — Paid social lead gen
Configure your trigger and run it once to get sample data.
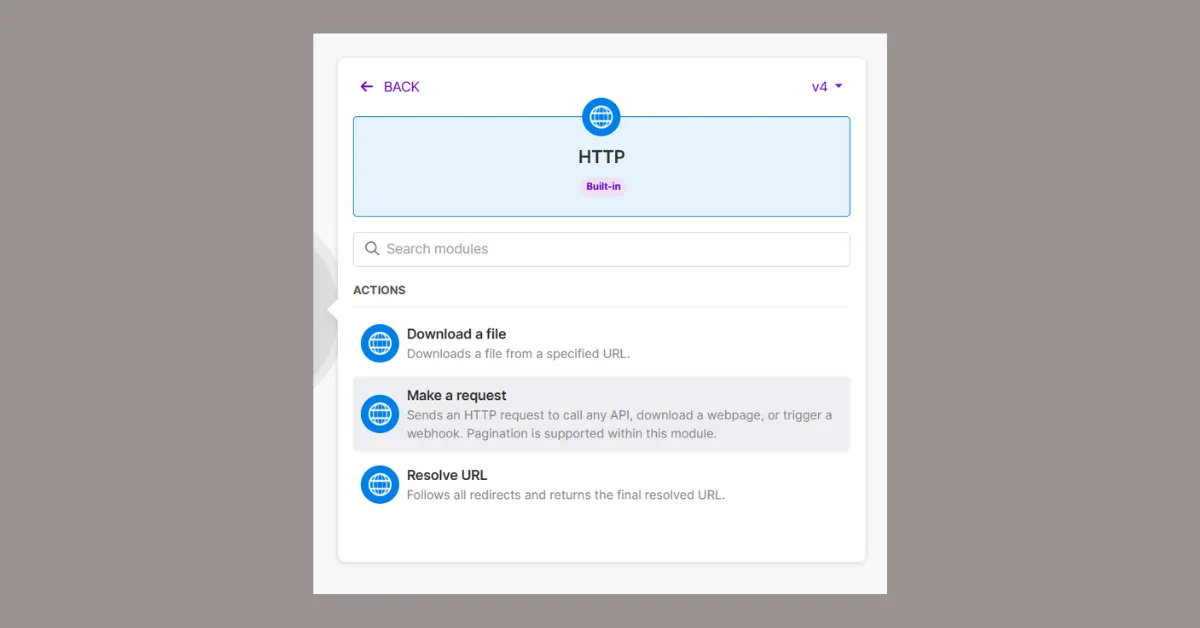
Step 3: Add the HTTP Module
Click the + after your trigger to add a new module. Search for HTTP and select Make a request.
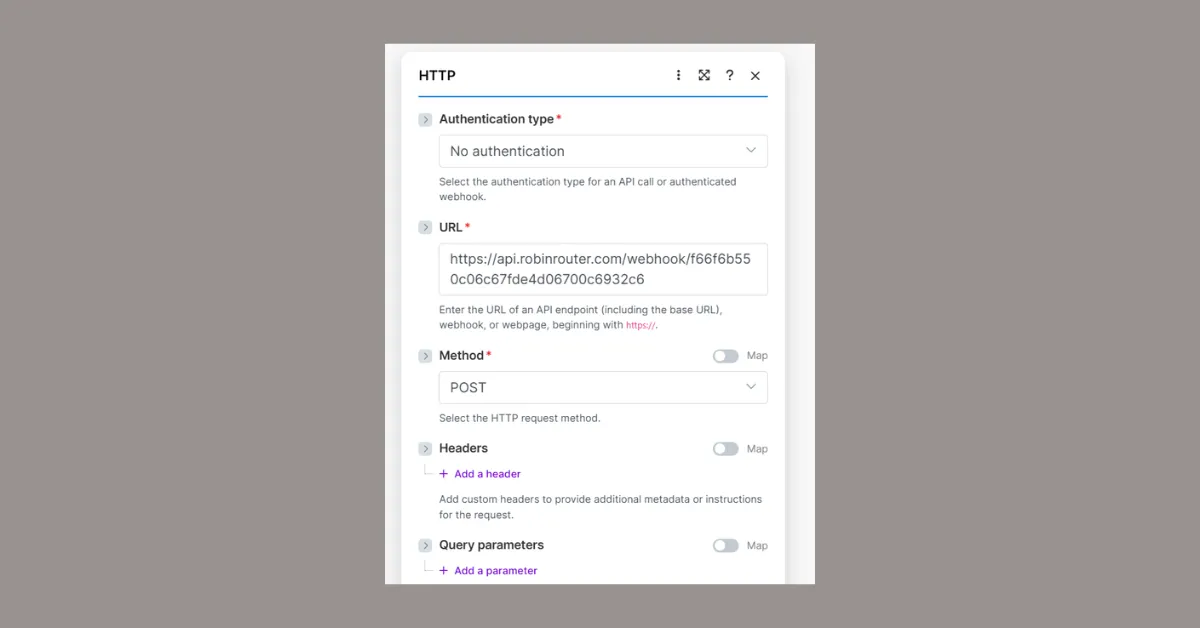
Configure it:
- URL: Paste your Robin Router webhook URL
- Method: POST
- Body type: Raw
- Content type: JSON (application/json)
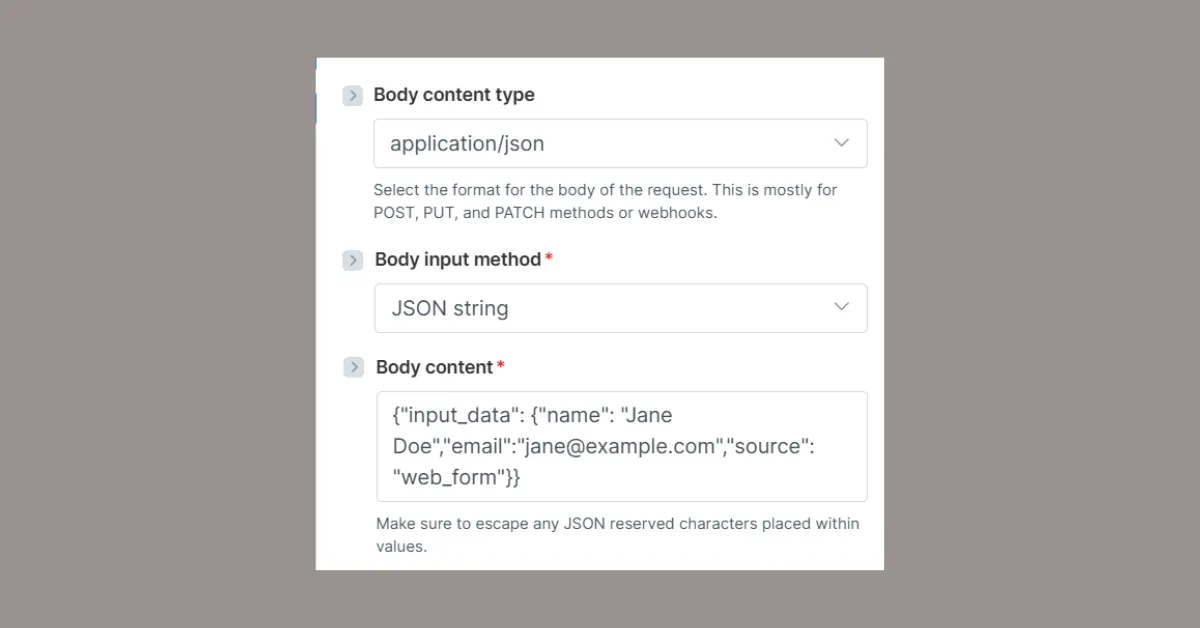
Step 4: Configure the Request Body (Optional)
If you just need the assignment without logging lead data, leave the body empty. Robin Router will assign the next member and return their data.
If you want to log lead data alongside the assignment, add a JSON body:
{
  "input_data": {
    "name": "{{1.name}}",
    "email": "{{1.email}}",
    "source": "google_forms"
  }
}
Replace {{1.name}} and {{1.email}} with the actual field references from your trigger module.
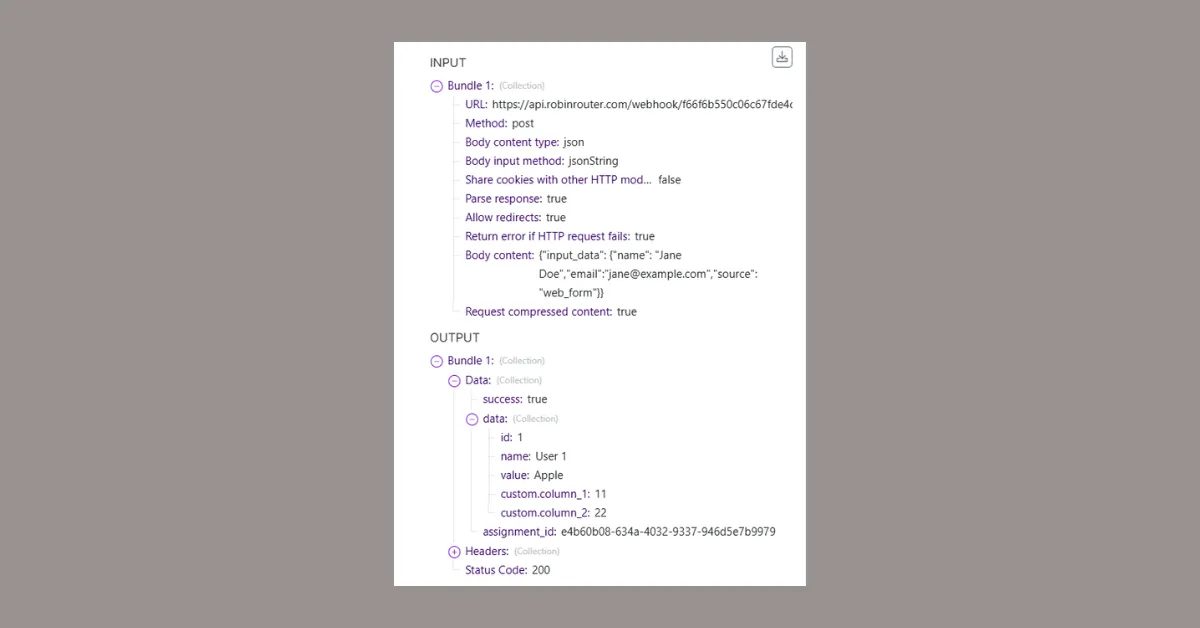
Step 5: Run and Verify the Response
Run the scenario. The HTTP module returns the Robin Router response:
{
  "success": true,
  "assignment_id": "782ce737-9b2e-41e6-8114-ef1022a1b711",
  "data": {
    "id": 4,
    "name": "User 4",
    "value": "user4@company.com",
    "custom_column_1": "44",
    "custom_column_2": "55"
  }
}
You can access data.name, data.value, and any custom columns in subsequent Make modules.
Tip: If Make doesn't automatically parse the response, add a JSON → Parse JSON module after the HTTP module and feed it the response body.
Step 6: Add Downstream Actions
With the assigned member data available, add modules to act on the assignment:
- HubSpot → Update Contact — Set the contact owner to
data.value - Slack → Send a Message — Notify the assigned rep
- Google Sheets → Add a Row — Log the assignment for reporting
- Gmail → Send an Email — Send an intro email from the assigned rep
- Salesforce → Update Record — Assign the lead owner in Salesforce
Step 7: Add Error Handling (Optional)
Right-click the HTTP module and add an Error Handler route. This fires if the webhook request fails. You can configure it to retry, send a Slack alert to the sales manager, or queue the lead for later processing.
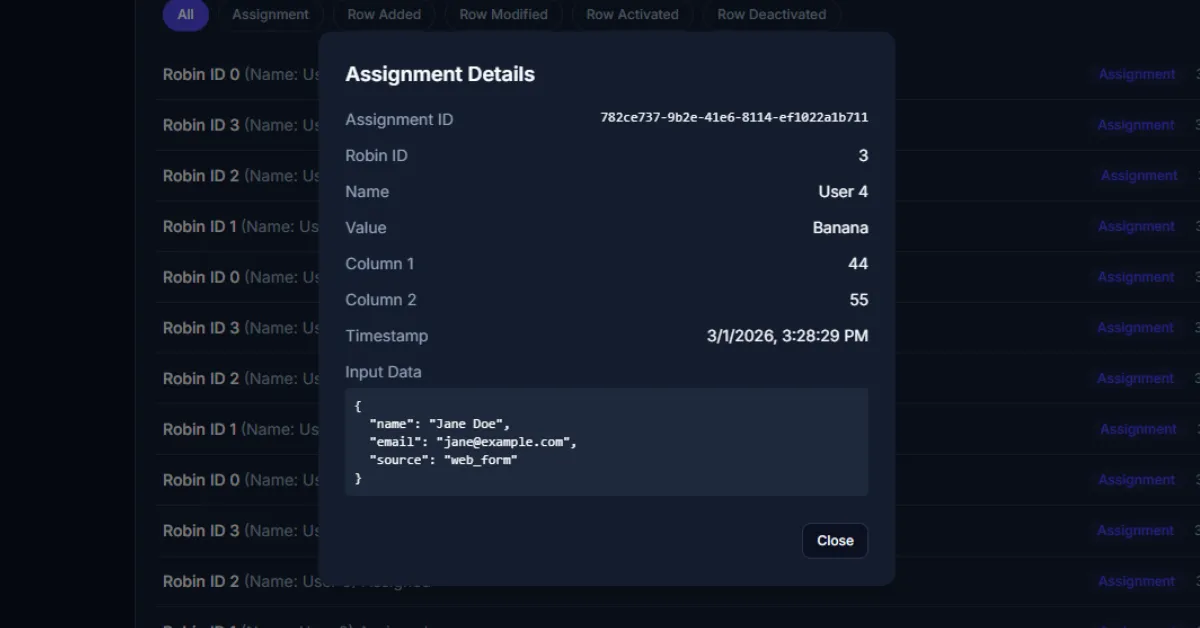
Step 8: Verify in Robin Router Logs
Back in Robin Router, go to the Logs page to confirm the assignment was recorded. Click any entry to see the full details — assigned member, custom columns, timestamp, and input data.
Done
Your Make scenario is connected to Robin Router. Every time your trigger fires, the next rep in the round-robin gets assigned automatically. Configure availability toggles and fallback members directly in the Robin Router dashboard — no changes needed in your Make scenario.