HubSpot Round Robin Implementation - Step By Step Guide
HubSpot's native round-robin works until it doesn't. No weights, no availability rules, no audit trail. Here's how to replace it with something that actually scales.
What You Need
- A HubSpot account (Professional or Enterprise plan for Workflows)
- A Robin Router account with a workflow and at least two robin group members
There are three ways to connect HubSpot to Robin Router. Pick the one that fits your setup.
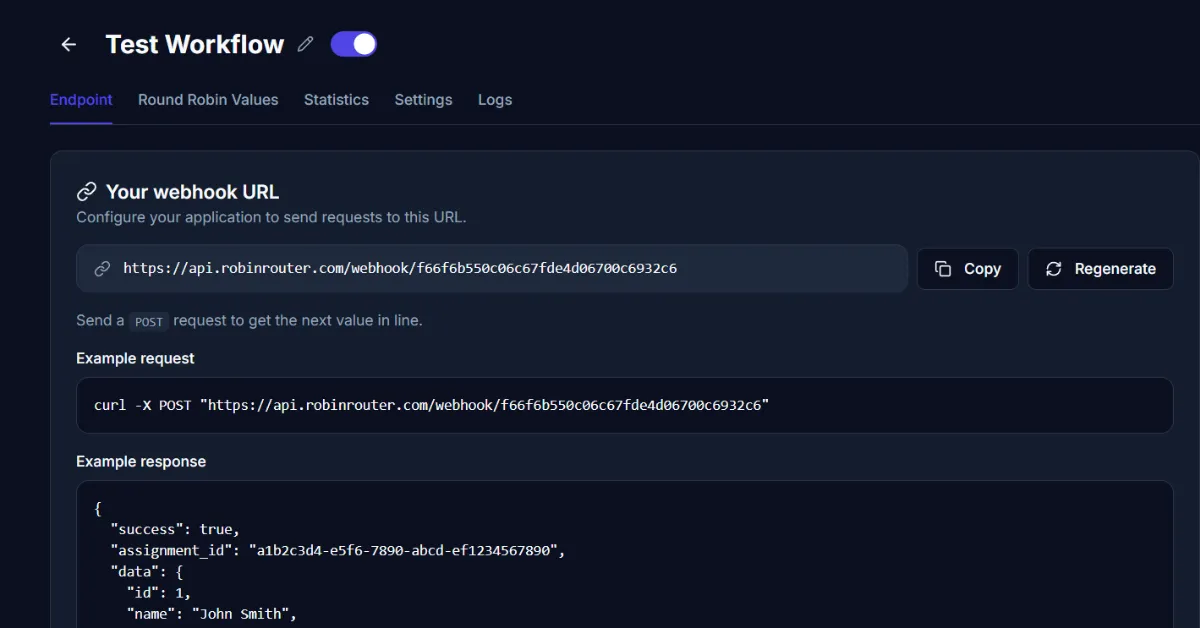
Copy Your Webhook URL from Robin Router
First, log into Robin Router, open your workflow, and go to the Endpoint tab. Copy the webhook URL — you'll need it for whichever method you choose below.
Method 1: HubSpot Workflow Webhook (Requires Operations Hub)
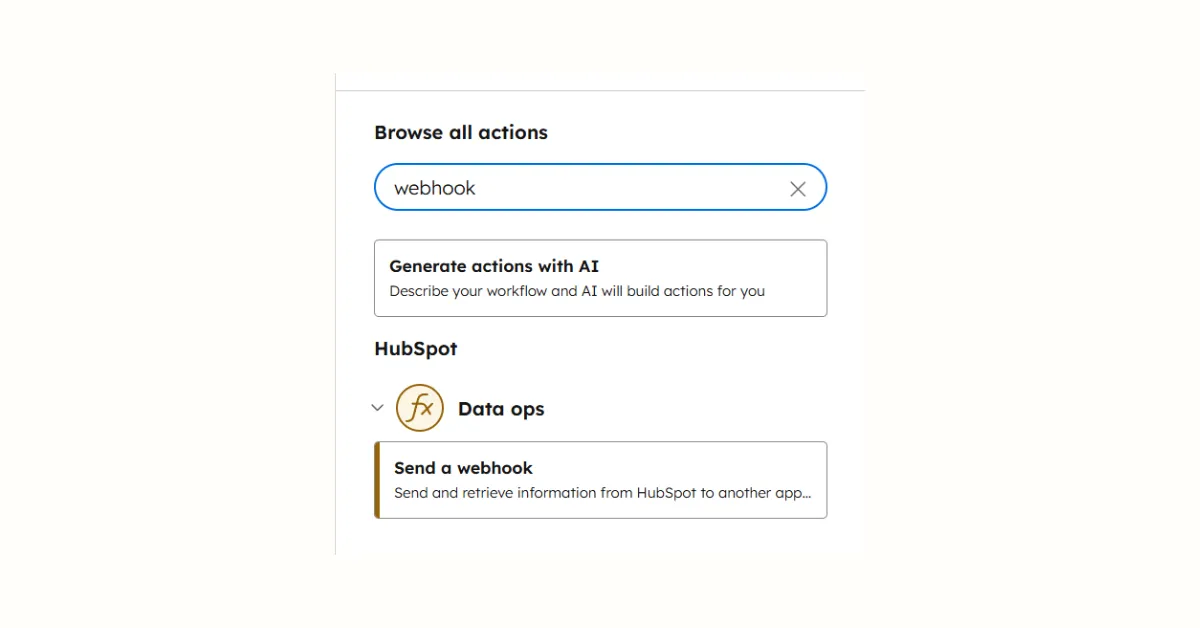
HubSpot's Workflows tool has a "Send a webhook" action under Data ops. This lets you call Robin Router directly from a HubSpot workflow — no middleware needed.
Note: The "Send a webhook" action requires HubSpot's Operations Hub. If you don't have it, use Method 2 or 3.
Steps:
- In HubSpot, go to Automation → Workflows and create a new workflow
- Set your enrollment trigger (e.g., "Contact is created" or "Form submission")
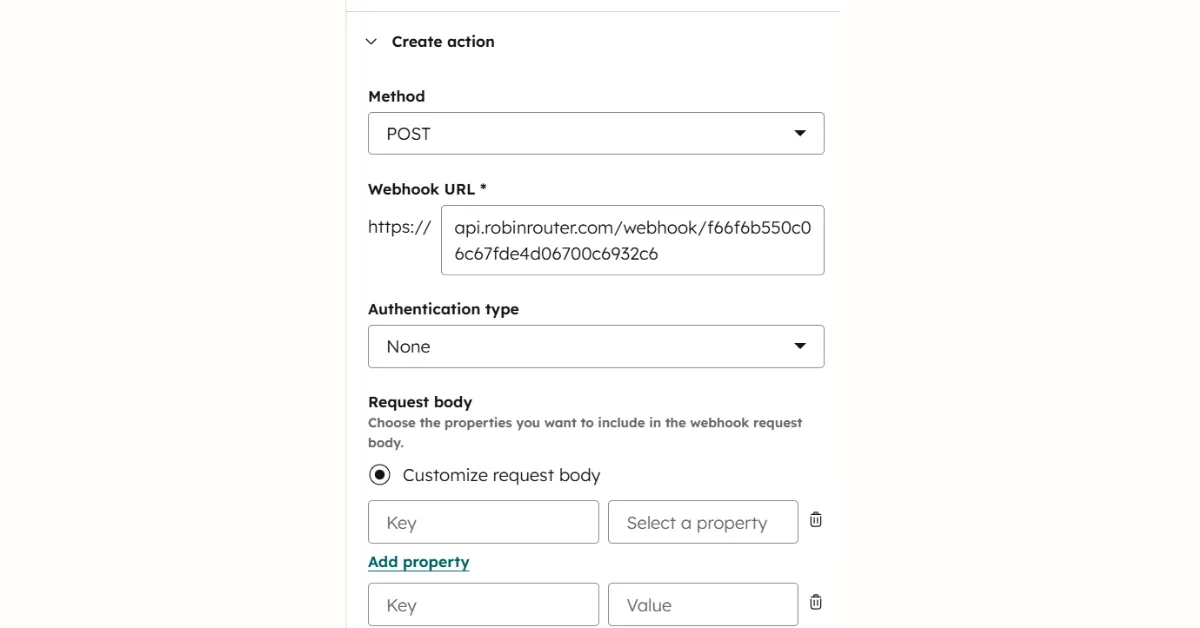
- Add an action: search for "webhook" and select Send a webhook under Data ops
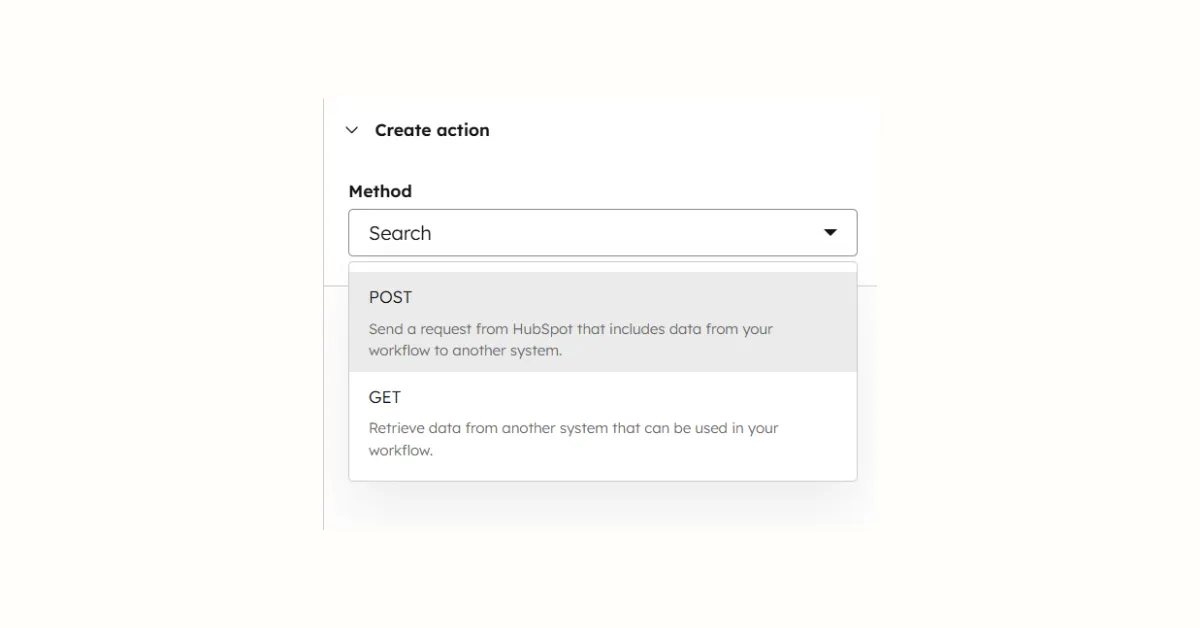
- Configure:
- Method: POST
- URL: Your Robin Router webhook URL (from the Endpoint tab)
- Add a subsequent action to set the Contact owner based on the webhook response
Optional — send lead data with the request body:
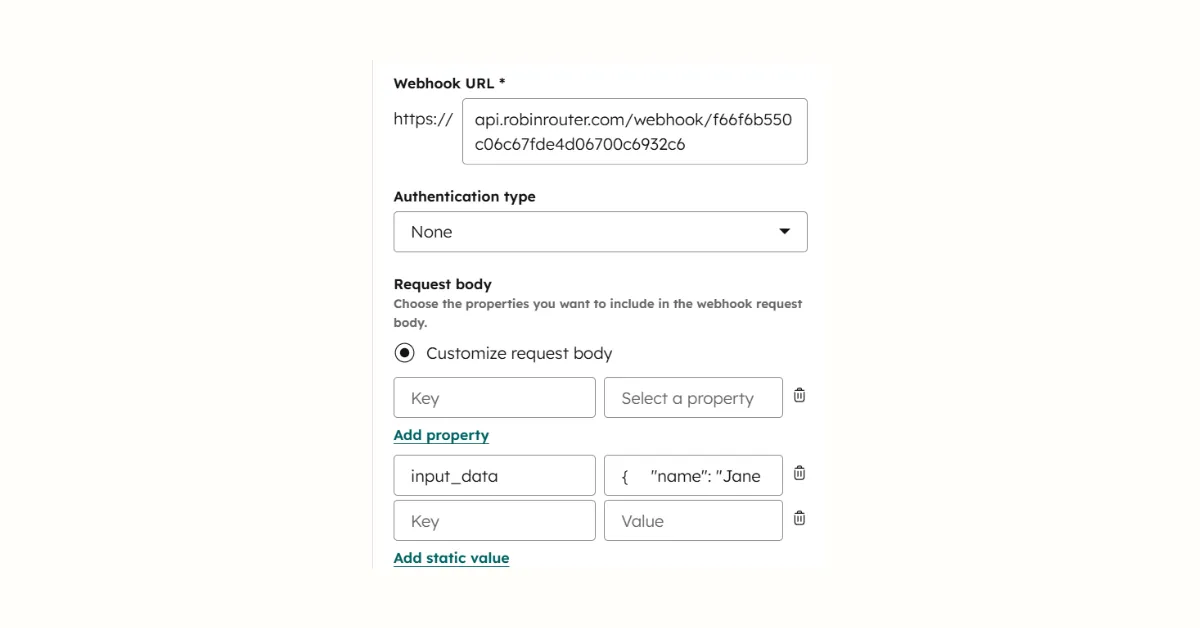
{
  "input_data": {
    "name": "{{contact.firstname}} {{contact.lastname}}",
    "email": "{{contact.email}}",
    "source": "hubspot_workflow"
  }
}
Method 2: Zapier as Middleware
If you don't have Operations Hub, use Zapier to bridge HubSpot and Robin Router.
Steps:
- In Zapier, create a new Zap
- Trigger: HubSpot → New Contact (or New Form Submission, New Deal)
- Action 1: Webhooks by Zapier → POST to your Robin Router webhook URL
- Action 2: HubSpot → Update Contact → Set Contact Owner to the
Data Valuefrom the Robin Router response
The Webhooks by Zapier action requires a paid Zapier plan.
Tip: For the full Zapier setup walkthrough with screenshots, see our Zapier Round Robin Lead Assignment Guide.
Method 3: Make as Middleware
Make (formerly Integromat) offers the same approach as Zapier, with a free HTTP module.
Steps:
- In Make, create a new scenario
- Trigger: HubSpot → Watch Contacts (or Watch Form Submissions, Watch Deals)
- Module 2: HTTP → Make a Request → POST to your Robin Router webhook URL
- Module 3: HubSpot → Update a Contact → Set Contact Owner to the response value
Make's HTTP module is available on the free plan.
Tip: For the full Make setup walkthrough, see our Make Round Robin Lead Assignment Guide.
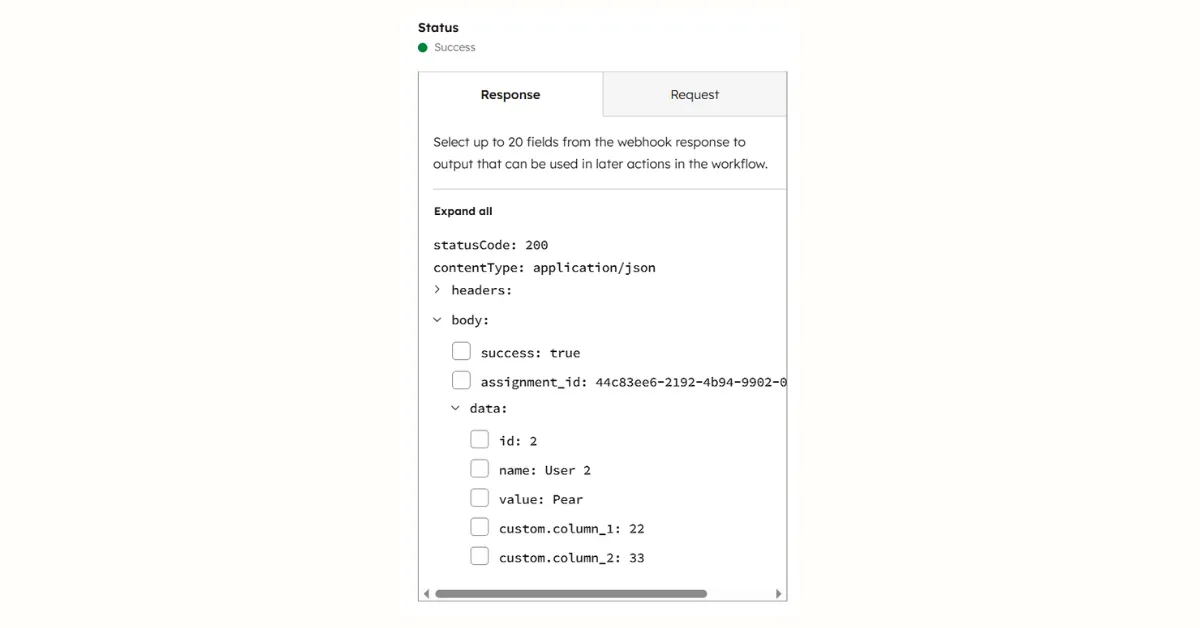
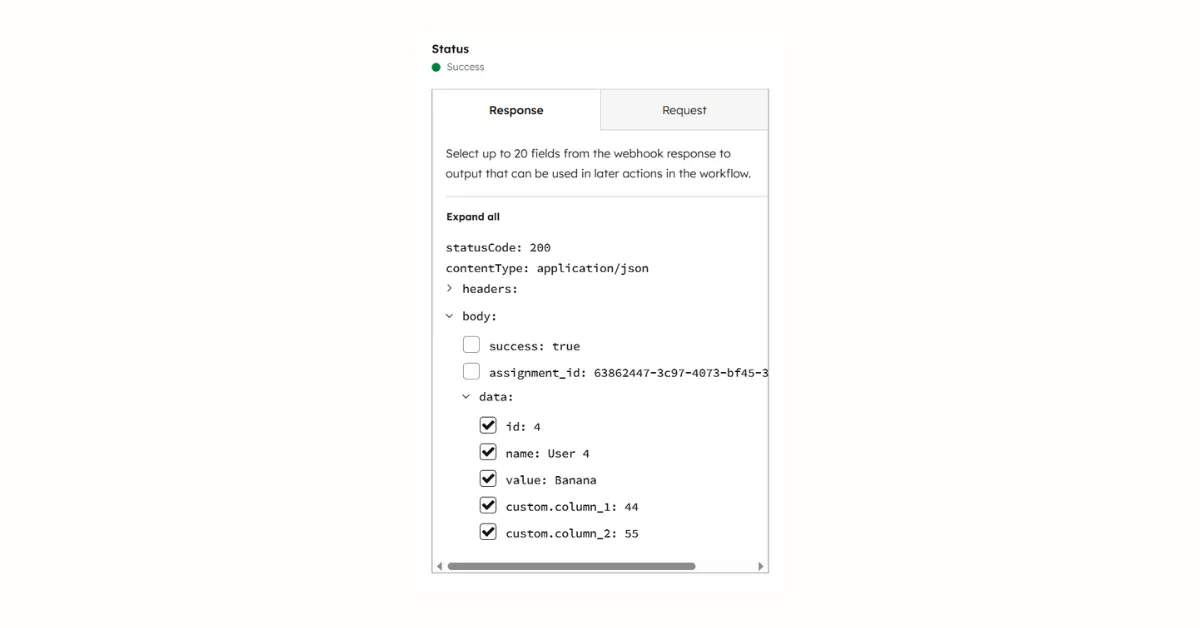
Test the Webhook and Review Response Data
After configuring the webhook action, test it. HubSpot shows the response with a success status and the assigned member's data. Select the fields you need for downstream actions.
Setting Up Robin Router Members for HubSpot
Each member in your Robin Router group needs a value that HubSpot can use to identify the rep. Two options:
- HubSpot Owner ID — Find it in Settings → Users & Teams. Set each member's value to their numeric owner ID (e.g.,
123456789). - Email address — Set the member's value to their email. Use a lookup step in Zapier/Make to find the HubSpot owner by email.
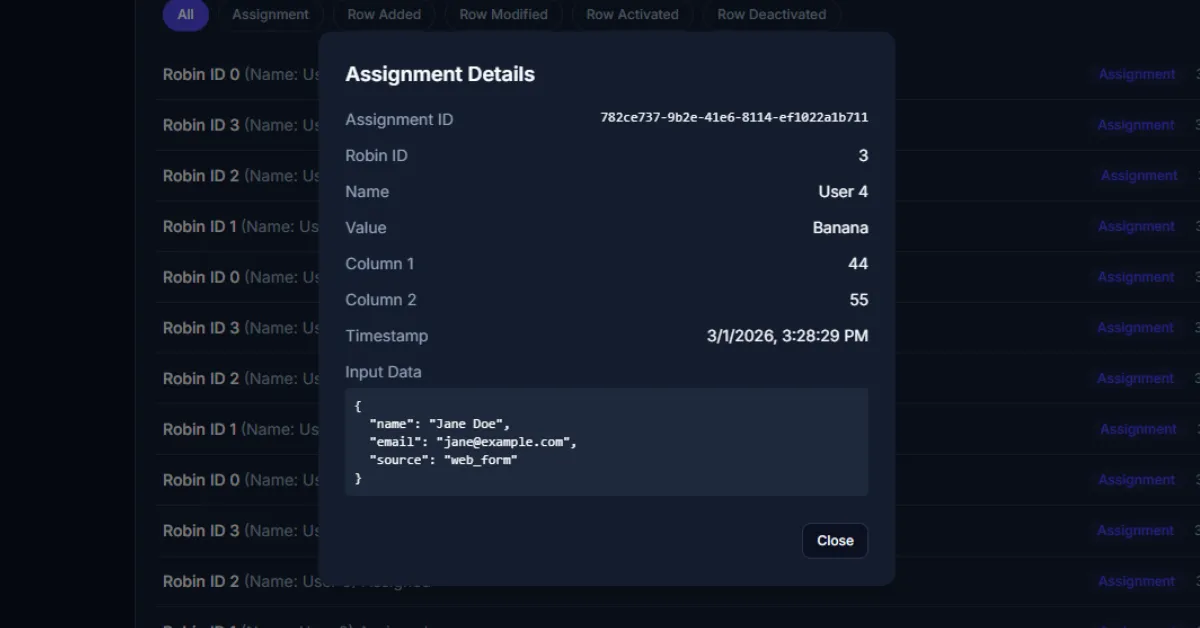
Verify in Robin Router Logs
After testing, go to the Logs page in Robin Router to confirm assignments are being recorded. Click any entry to see the full details.
Done
Your HubSpot workflow is connected to Robin Router. Every new lead gets assigned to the next rep in the round-robin automatically. Configure availability toggles and fallback members in the Robin Router dashboard — changes take effect immediately across all active workflows.